"It is the supreme art of the teacher to awaken joy in creative expression and knowledge."
~Albert Einstein
Welcome to the Amherst Art Area for Grades K-6!
Hello! My name is Ms Catie Haase and I have the privilege to teach art to students from Kindergarten to 6th grade in Amherst, WI. These pages will be for students, families, and friends to see what is being created in the art room. I am currently working on having each grade have a core art idea that the majority of the lessons will be based around. To see more details, you can view each specific grade's page located in the menu at the top of the home page. I hope you enjoy our work and please feel free to contact me with any comments you may have!
With the help from our fantastic PTO, our website is now a paid for published site allowing me to combine all the grades onto one site with as many photos as we want!! HOORAY!!!
With the help from our fantastic PTO, our website is now a paid for published site allowing me to combine all the grades onto one site with as many photos as we want!! HOORAY!!!
Jane-Bob, our Recycle Monster
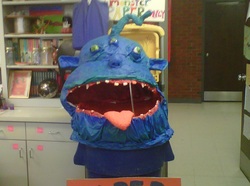
Jane-Bob in the 2010-2011 school year.
I created Jane-Bob to encourage the kids to be pro-active in our recycling efforts. After all, who wouldn't want to feed a monster? Jane-Bob was inspired by a wonderful book that I purchased for myself for my birthday last year by Dan Reeder titled 'Papier Mache Monsters'.
The monster became named Jane-Bob because the kids continually argued if it was a boy or a girl, so a compromise has been reached. Jane-Bob is both a girl and a boy, monsters can do that, did you know? There is still quite a bit of work for me to do with Jane-Bob, more drool, clean his/her teeth, add some eyelashes, and numerous coats of some kind of shellack to keep her/him looking new.
2011-2012 School Year
Jane-Bob is currently residing in my Mom's garage, also known as the Monster Hospital. Last year Jane-Bob's teeth were frequently wiggled by small hands and he/she now needs extensive surgery to revive the Jane-Bob that we all know and love. Never fear!! She/he shall return in even better form than last year!
Where do the project ideas come from?
As a rather, um, artsy person (Imagine that! An artsy art teacher!), ideas for projects come to me from all kinds of places: art museums and shows, television advertisements, billboards, web sites, magazines, books, and my own imagination. A few of my favorite web sites are: http://www.mrsbrownart.com/index.htm http://www.deepspacesparkle.com/ http://www.artprojectsforkids.org/p/more-murals.html http://www.dickblick.com/lesson-plans/ I have also recently been introduced by a friend to a site called Pinterest, which is a fantastic place to lose a few hours!
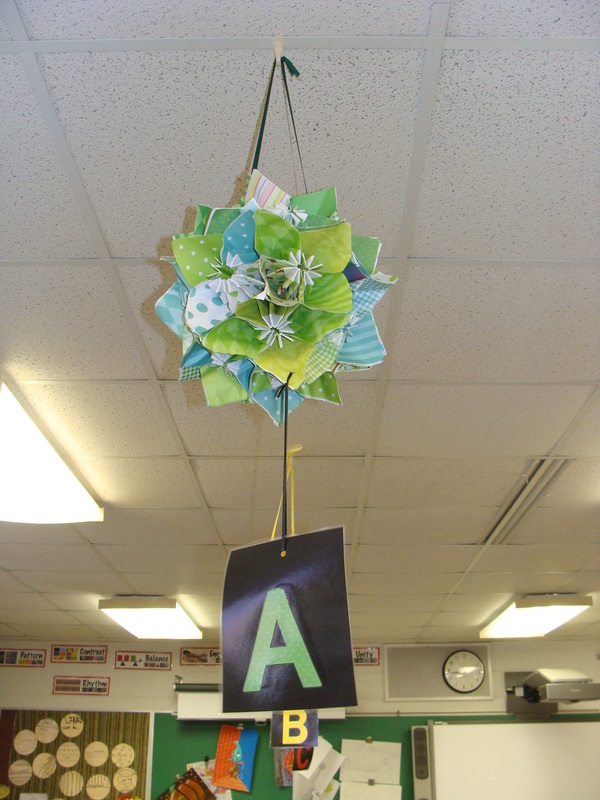
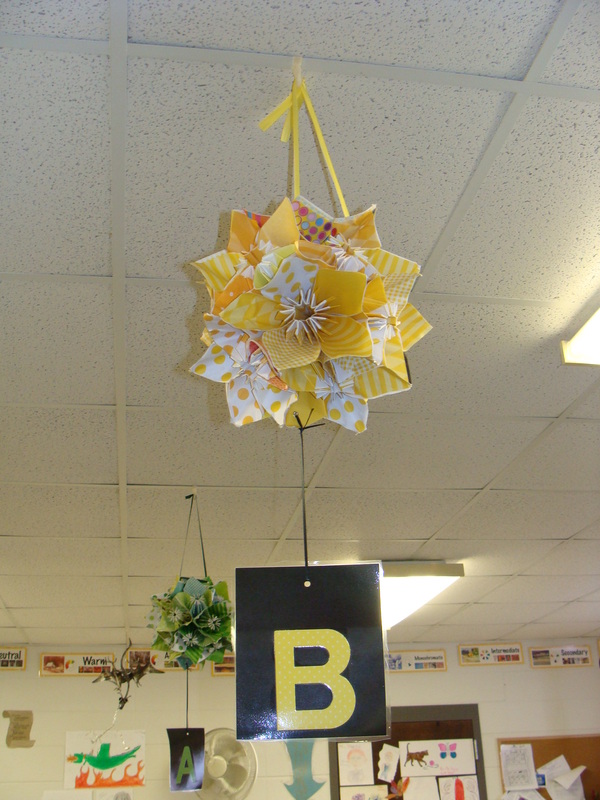
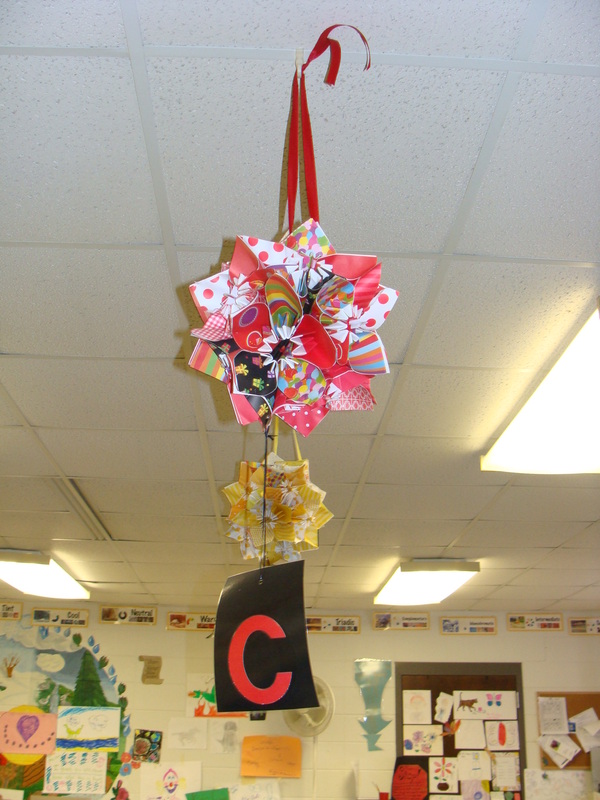
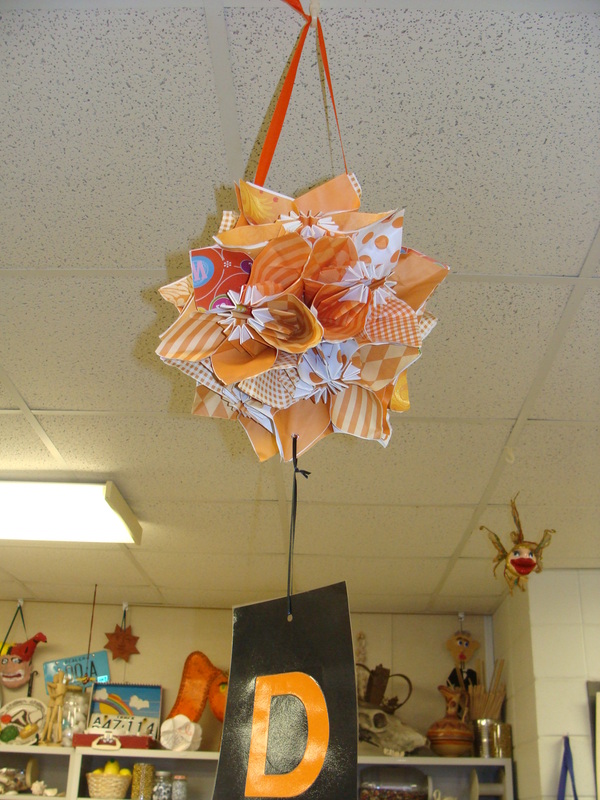
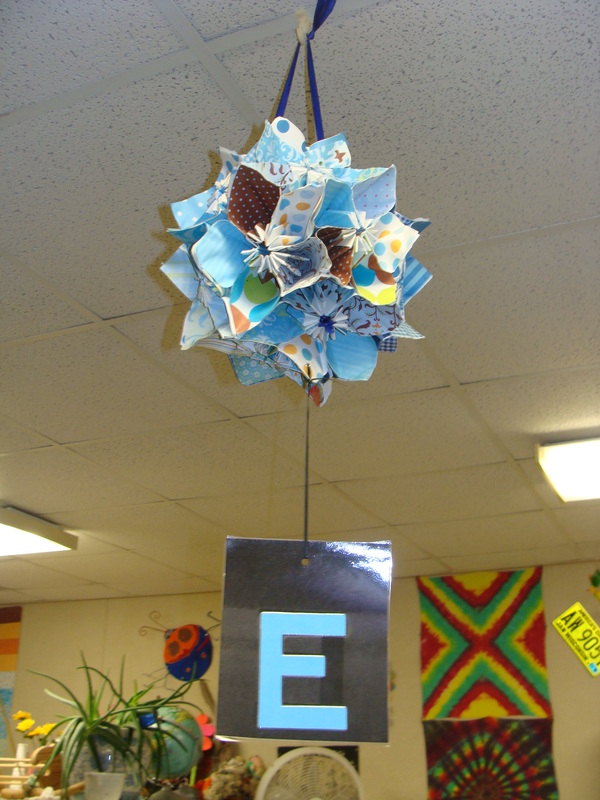
Origami Paper Flower Balls
The art room is organized by colors. Each table has a color, a table tray that matches the table color and a folder for each table's art work to go into while we are still working on it. Originally, I had simple table numbers in different colors hanging above each table, which was utilitarian, but not very artsy. Last summer a friend showed me how to make beautiful origami flowers which inspired me to create one for each table. You can find instructions here as well as on YouTube, under the title How to Make an Origami Flower Ball by Febbik.

Creating Art from Plastic Cups
DO ALL OF THESE STEPS WITH AN ADULT!!!
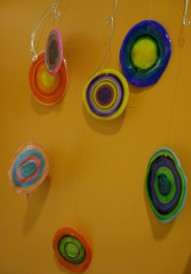
Because of popular demand, I am posting directions on how to decorate and melt plastic cups. This has been hugely popular with grades 3, 4, 5, and 6. I found this photo of a mobile made of melted plastic cups on the website Pinterest.com
DO ALL OF THESE STEPS WITH AN ADULT!!!
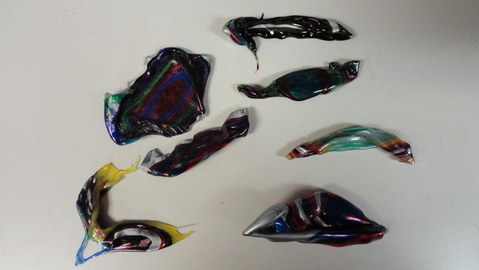
The web site that the Pinterest photo led me to (http://www.aflnc.org/projects/?paged=15) simply said to use permanent markers to color plastic cups and that the more solid the coloring, the better the cups would look. Easy, great! So I tried it…and tried it and tried it!
Here is what cups that are too big become:
Because of popular demand, I am posting directions on how to decorate and melt plastic cups. This has been hugely popular with grades 3, 4, 5, and 6. I found this photo of a mobile made of melted plastic cups on the website Pinterest.com
DO ALL OF THESE STEPS WITH AN ADULT!!!
The web site that the Pinterest photo led me to (http://www.aflnc.org/projects/?paged=15) simply said to use permanent markers to color plastic cups and that the more solid the coloring, the better the cups would look. Easy, great! So I tried it…and tried it and tried it!
Here is what cups that are too big become:
DO ALL OF THESE STEPS WITH AN ADULT!!!
To create a beautiful mobile or anything else you may dream up, follow these easy steps that have been tried and true tested by me.
1. Find an adult who is willing to supervise this project with
you!
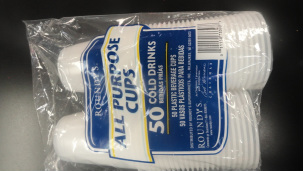
2. Buy generic 8-9oz. plastic cups (I have found that Roundy’s brand cups work the best, see the photo below) The recycle number on the bottom of the cup needs to be a 6 as well. Other numbers do not work as well..
3. Flip your cup upside down (where you would normally put your lips is now touching the table) and color your cup using permanent markers. Remember! The more solid you color your cup, the better it will look!
4. Heat your oven to 250 degrees.
5. Cut a brown paper bag to cook your cups on. You only need one layer of bag. Please recycle the left over bag parts.
6. Place the bag on the middle oven rack.
7. Set your cups upside right on the paper bag, leaving about an inch melting space all the way around each cup.
8. Don’t leave your oven; it only takes a few minutes! Watch as your cups transform into flat, round disks.
9. Carefully pull out the paper and your cups. You have about 15 seconds to squish out any bubbles with a spatula.
10. If you choose to make a mobile, have an adult use a hole punch to make a hole and fishing line to string it together. An old wire coat hanger works for the main form to hold the melted cup forms.
1. Find an adult who is willing to supervise this project with
you!
2. Buy generic 8-9oz. plastic cups (I have found that Roundy’s brand cups work the best, see the photo below) The recycle number on the bottom of the cup needs to be a 6 as well. Other numbers do not work as well..
3. Flip your cup upside down (where you would normally put your lips is now touching the table) and color your cup using permanent markers. Remember! The more solid you color your cup, the better it will look!
4. Heat your oven to 250 degrees.
5. Cut a brown paper bag to cook your cups on. You only need one layer of bag. Please recycle the left over bag parts.
6. Place the bag on the middle oven rack.
7. Set your cups upside right on the paper bag, leaving about an inch melting space all the way around each cup.
8. Don’t leave your oven; it only takes a few minutes! Watch as your cups transform into flat, round disks.
9. Carefully pull out the paper and your cups. You have about 15 seconds to squish out any bubbles with a spatula.
10. If you choose to make a mobile, have an adult use a hole punch to make a hole and fishing line to string it together. An old wire coat hanger works for the main form to hold the melted cup forms.