Self-Portraits from the 2011-2012 School Year
At the start of every year I ask the students to draw a self-portrait. Every year the child's skill level improves and the drawings become more evolved. I send letters home to encourage parents to keep these yearly drawings as a wonderful momento and I sincerely hope that they do. I am trying to have each grade have a different theme or focus for their portrait to avoid the class groaning, "We did that LAST year!"
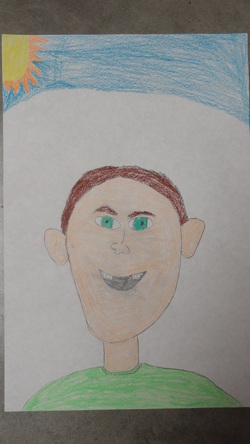
The first grade drawing to the left is an incredible example of a very talented first grader! Yes, that was really drawn by a 6-year-old child with only basic instruction given on my part. First graders are given mirrors and asked to REALLY look at themselves. Not make silly faces at themselves, but look at the shape of their nose, the simple lines that come together to create the complexity of a face. How does your face look if you are happy, sad, mad, frustrated, or tired? If you are smiling, are you missing teeth? My mantra becomes, "Draw what you see!! Simple shapes!! Draw what you see!"
The first grade drawing to the left is an incredible example of a very talented first grader! Yes, that was really drawn by a 6-year-old child with only basic instruction given on my part. First graders are given mirrors and asked to REALLY look at themselves. Not make silly faces at themselves, but look at the shape of their nose, the simple lines that come together to create the complexity of a face. How does your face look if you are happy, sad, mad, frustrated, or tired? If you are smiling, are you missing teeth? My mantra becomes, "Draw what you see!! Simple shapes!! Draw what you see!"
Fall Realistic Pumpkins From the 2011-2012 School Year
First graders created these beautiful, realistic looking pumpkins using chalk. (Yes, really! First grade!) This is a two 45-minute class period project. Each student receives a 12x18" black paper and each table of four children has a pie pan tin with the correct colors of chalk in it for this project.
DAY ONE: Before we strted drawing, we looked at my very realistic looking faux pumpkins and talked about the sections and colors of the pumpkins. Then Ms. Haase talked about how very messy chalk can be, messy but very rewarding and fun (Don't blow the chalk dust off your paper!!)! We drew together step-by-step. First, we drew a large orange oval, using either light or dark orange. Then we colored in the oval, trying to be very careful not to completely cover the line of the original oval. Next, we used the other orange to add some depth to the oval (if they originally used dark orange, they now used light orange and vice versa). Fourth, we discovered that Ms. Haase really wasn't kidding about how messy chalk can be because we blended the two colors of orange using a finger...although some of us used our whole hand, again trying not to completely erase the original oval. Fifth, we added a half-oval attached to the sides of the original oval in order to create the sections of our pumpkin; then we repeated coloring in the ovals and adding the opposite orange color to create depth. Ms. Haase then talked about highlights and lowlights in art. Highlights are the brighter, shiny-looking spots that the light hits first; while lowlights are places that the light can't quite reach, places where shadows reside. To add highlights we needed to decide where the light source was, in our case the light of the moon. Students had to decide if they were going to have a full moon or a cresent moon and then add it to the sky to the right or the left of the pumpkin. Highlights were added on the side of the pumpkin with the moon using white chalk and then lightly blended.
DAY TWO:


Plaster Craft and Glitter Snowflakes from the 2010-2011 School Year
This project has become a favorite of the kids as well as mine. It is two projects for the price of one, so to speak, and takes four to five classes. The projects involve a bit of preparation (as with most art projects!) on my part, but its completely worth it!
DAY ONE we read a book entitled 'Snowflake Bentley' by Jacqueline Briggs Martin and illustrated by Mary Azarian (ISBN 0-395-86162-4). Then each child gets to pick a sheet of background paper. We discuss how many arms a snowflake has and if all the arms are the same or different. I also mention an art vocabulary word to them, rotational symmetry, and talk about how that means symmetry in a circle. The first step for our first project is to draw six LARGE snowflakes, making sure they are symmetrical with six arms. Next, trace over the pencil lines using glue. Finally, add the glitter to make it sparkle! This first simple lesson teaches the kids how to limit the tiny details that some of them love to do so much because the details get lost in the glue.
DAY ONE we read a book entitled 'Snowflake Bentley' by Jacqueline Briggs Martin and illustrated by Mary Azarian (ISBN 0-395-86162-4). Then each child gets to pick a sheet of background paper. We discuss how many arms a snowflake has and if all the arms are the same or different. I also mention an art vocabulary word to them, rotational symmetry, and talk about how that means symmetry in a circle. The first step for our first project is to draw six LARGE snowflakes, making sure they are symmetrical with six arms. Next, trace over the pencil lines using glue. Finally, add the glitter to make it sparkle! This first simple lesson teaches the kids how to limit the tiny details that some of them love to do so much because the details get lost in the glue.
DAY TWO we "OOOO" and "Ahhhh!" at the beautiful photography in the book entitled 'The Snowflake: Winter's Secret Beauty' text by Kenneth Libbrecht and photography by Patricia Rasmussen (ISBN 978-0-89658-630-7). Then each student receives a copy of a seven inch circle to draw one large snowflake in. I emphasize that they shouldn't make too many details, reminding them about how the glue made that difficult. Then I tape a sheet of wax paper over the circle, double checking to make sure they remembered their name and to use rotational symmetry.
DAY THREE the kids walk into the art room with a gallon bucket of nice warm water on each table. Very quickly I show the kids what to do with that pile of seventeen strips of Plaster Craft at each spot. The seventeen strips of Plaster Craft is a huge part of the prep work involved in this project. Unfortunately, it is the only way that I have found to make sure the kids use enough to make their snowflake firm, but not waste any. Once Plaster Craft strips get wet, you have to use them or they are no good. They dip each strip in the water, sqeegie the excess water off and fold it into a long strip which goes onto the wax paper following their design from the last class. This is a rapid process because they have to complete their design in this class because we can't add to it later. I always make a few extras, just in case a child missed that day.
DAY THREE the kids walk into the art room with a gallon bucket of nice warm water on each table. Very quickly I show the kids what to do with that pile of seventeen strips of Plaster Craft at each spot. The seventeen strips of Plaster Craft is a huge part of the prep work involved in this project. Unfortunately, it is the only way that I have found to make sure the kids use enough to make their snowflake firm, but not waste any. Once Plaster Craft strips get wet, you have to use them or they are no good. They dip each strip in the water, sqeegie the excess water off and fold it into a long strip which goes onto the wax paper following their design from the last class. This is a rapid process because they have to complete their design in this class because we can't add to it later. I always make a few extras, just in case a child missed that day.


DAY FOUR is a paint day! I have peeled all the dry snowflakes off the wax paper, written each name and class on the back of each snowflake with a marker and glued any bits that may have fallen off. This year I decided to try painting the snowflakes with watercolor paints, other years we have used tempera paint. We talked about warm (red, orange, yellow) and cool (blue, green, purple) colors and what colors they think a snowflake should be. I leave the choice completely up to them, after all, it is their art work, but I do ask them if snow makes them feel warm or cold. Aren't they lovely??


DAY FIVE is the kid's favorite day! We add glitter and shine using a mix of shiny ModPodge and water. As the kids paint on the shine, I go around with the glitter. It is important to make sure the glitter contacts our shine mixture while it is wet, or all the glitter falls off. Finally this project is done! Our snowflakes are a beautiful success!
Line and Patterned Animals from the 2010-2011 School Year
For this project we start with a very, very old book that I found at a library clearance sale titled 'The Surprise Party' by Pat Hutchins. This book is so old that it doesn't even have an ISBN for you to look up! Anyway, this book has fantastic patterns on all of the animals that I encourage all of the kids to look closely at. After the story, the kids all return to their seats, I pass out 12x24" white paper and fire up the SMART board. I draw three different animals on the board and the kids are asked to be patient and pick only one. I drew an owl, a rabbit, and a frog. Once they had the basic shape down, I handed out thick line permanent black markers and asked them to trace their pencil lines. Then we talked about patterns and how lines can be. How lines can be is a bulletin board display that is up in the art room. (Lines can be: horizontal, vertical, loopy, think, medium, thin, dashed, castle, diagonal, intersecting, scribble, curvy, spiral. and wavy.) Then I asked the kids to draw patterns using the markers in the animals.
DAY TWO: Some of the students will continue drawing patterns using the markers while others start using colored pencils to add a dash of color to the animals. We also talk about horizon lines and specifically not to draw the horizon line right through their animal.
DAY TWO: Some of the students will continue drawing patterns using the markers while others start using colored pencils to add a dash of color to the animals. We also talk about horizon lines and specifically not to draw the horizon line right through their animal.


